An icon of Liam's email address An icon of Liam's facebook account An icon of Liam's twitter account An icon of Liam's youtube address
Example of ZBrush works

ZBrush Basic Sculpting

Tutorial by Liam Yoo

ZBrush Basic Sculpting

Purpose of This Tutorial

There are three main goals in this tutorial:

☑ Introducing ZBrush and 3D Sculpting.

☑ Learning Basic Sculpting Skills

☑ Understanding the ZBrush's working process.

Icon images of Quixel Suite 2

What is the ZBrush?

A logo image of ZBrush 
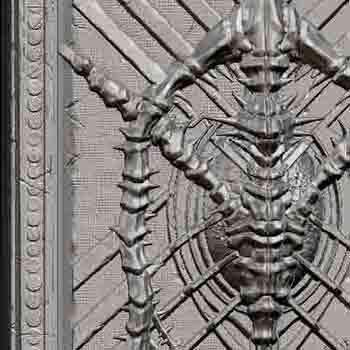
ZBrush is the most powerful digital sculpting and painting tool that has revolutionized the 3D industry with its amazing features and intuitive workflows. ZBrush allows you to create up to a billion polygons for 3D modelling.

Step 1: Basic Sculpting Skills

A shape of the texture map

a logo image ofZBrush

Import an OBJ file or Choose one object.

An image the import button

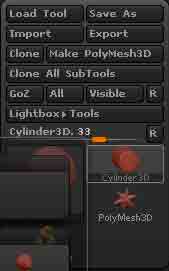
⚬ Drag on the Screen to create the object.

An image about objects in the ZBrush

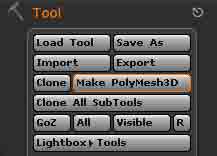
⚬ Click Make Polymesh 3D button.

An image of the Make Plymesh 3D button

⚬ Click Edit to sculpt.

An image about sculpting

⚬ Go to Geometry- Click Divide button to subdivide mesh.

An image about the divide button

⚬ Choose brush type, z intensity, draw size and focal shift.

⚬ Draw and sculpt.

Sculpting exmaple A Sculpting exmaple B
Remember: Pen Tablets such as Intuos Pro are recommended.

Step 2: Useful Shortcuts

An image of the Intuos Pro

a logo image of NDO

Shortcuts of ZBrush
Shortcuts Functions

Ctrl+D

Subdivide mesh

Shift

smooth brush

Alt+Drawing

- Z intensity

[ ]

Increase and decrease brush size

Ctrl+Drawing on mesh

Masking

Ctrl+Alt+Drawing on mesh:

Erase Masks

X

Local Symmetry

Back To Top